

Using layer masks in Photoshop
Originally written by James Richardson on 01/20/2009

Photoshop has this great feature called layer masks. Layer masks are great because you can edit an image without damaging the integrity of the photo. For example, when you edit a photo using the eraser tool, the changes are permanent. You can undo the changes while Photoshop is still open; however, what happens if your program crashes or you close Photoshop? All of your changes are set in stone. With layer masks, you can go back and change what you did at a later date. We will be making a cloth Chinese emblem. This tutorial is fairly comprehensive
This tutorial will cover the Channels panel, Quick Mask Mode, and Selections. These are included in the tutorial because they are closely related to the layer masks. Layer masks are used also for making selections. Also, layer masks are found in the channels panel also. All of these will be discussed in detail shortly. This tutorial is a bit long; however, it will cover the necessary subjects and boost your Photoshop skills tremendously.
Create a new document.
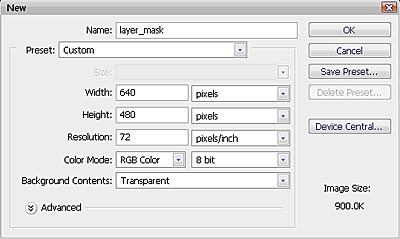
First we need to make a new Photoshop document. I named this document "layer_mask."
Set the size to 640X480, Resolution 72, RGB color mode, and a transparent background. These settings are ideal for the web environment. (See illustration to the left)
When you are done click OK.
Import the image into Photoshop.
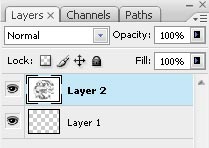
Click this link "Download Image" to download the image that we will be working with.We will not be doing any image editing to the image itself. Create a layer. Make sure the layer 2 selected. Drag the image into Photoshop.
Select all of the image and copy and paste the image into your "layer_masks" document that you created on layer 2. Your layers panel should look like the illustration to the left.
Selecting the image with the Magic Wand.

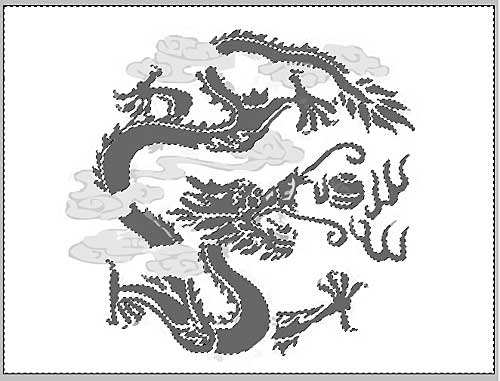
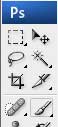
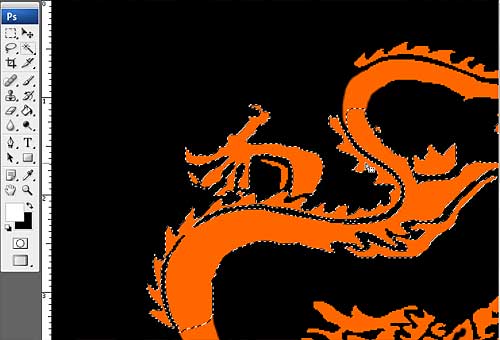
With the layer 2 selected where you pasted your image, use the magic wand tool (See illustration to the right) and select the white area of the image.
Make sure you have the "tolerance" of your magic wand set at 100. The tolerance is found in the options panel at the top of the window.
With the tolerance at 100, you will be sure to select everything except the dragon body and flames.
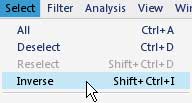
After you select the white area, go to select option at the top of the Photoshop program window and select inverse. (See illustration to the left)
This will select all of the dragon body parts that you want.
Adding a new layer mask

Make sure you have the Layer mask selected and not the image.
See image to the left

With the dragon selected, click the "Add Layer Mask" button at the bottom of the layers panel.(See illustration to the left) Masking the image will appear to erase everything around the image. In fact it is "masking" or making those areas hidden. By selecting the paint brush , you can add to the mask using white or subtract from the mask using black. The layer mask only works in "gray scale." That means no color can be added to the layer mask.
The color Gray will half way reveal the image making a semitransparent effect. For sake of brevity, we will only be using black and white. The black works just like an eraser and the white works the opposite of an eraser. This is where you will select parts of the image that was missed and mask over them with the black to "erase" or mask over those areas for cleaning up the image. Note that the image has not been modified at all. Everything done is on the mask only.
Working with the layer mask
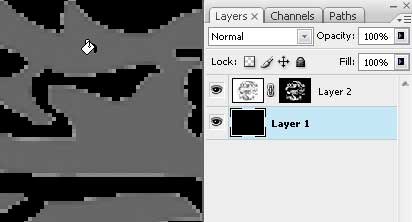
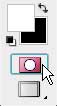
When working on the layer mask it is imperative that you have the correct thumbnail selected when working on the mask. The image thumbnail is the thumbnail to the left on the layer. The layer mask is the thumbnail to the right of the image thumbnail and appears in black and/or white. When the image thumbnail is selected, there will be a box around the thumbnail showing which one is selected.(See left illustration below)
When the layer mask thumbnail is selected there will be a box around the layer mask. (See right illustration below) You must have the layer mask selected in order to work with it. Otherwise, you will be editing the photo itself. This is how you will work with the layer mask.


Using the Paint Brush on a Layer Mask

Now we will edit parts of the mask. Choose the magic wand again and select the dragons nose.With the layer mask selected, select the paint brush in the tools panel. (See illustration to the right)
You will be using the paint brush to edit the mask. Make sure you have the black selected in the tools panel. With the paint brush, paint over the nose. This will erase the nose area making it transparent. (See illustration to the left)
Repeat this to any other place in the image you think should not appear. You can also erase any spots that should not be in the image.
Fill the background with black.
When working with masks, it is a good idea to fill the background with a solid color that makes it easier to see parts that have been missed. The color I chose here is black. You can use any color, but I find black to be the best to see any flaws.(See illustration to the left) Your layers panel should look like the layers panel in the illustration to the left.
Color the image over.

Now you want to select the image layer (Layer 2) and color over the image with a color.
Go to the "add a layer style" button at the bottom of the layers panel and select "color overlay." (See left illustration)
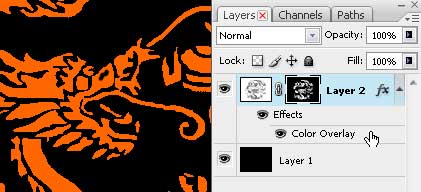
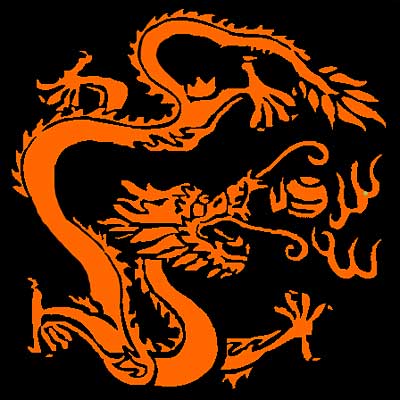
I chose the color #ff6600. You can change the color by filling in the image itself with the paint bucket or you can use the layer styles and chose color overlay.
I chose the Layer style because the purpose of this tutorial is to not edit the image at all. Your image should be orange and the layers panel should look like the left illustration.
Fix the parts that are missing.

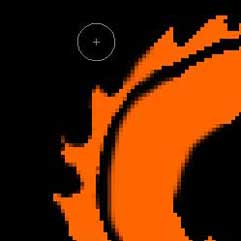
Now, with the layer mask selected, fix the areas of the image that are missing or choppy looking. The dragon is missing parts of the body and the fins. Fill in the areas of the dragons body that are not connected.
Choose the paint brush with the black selected and unmask the areas where the body would appear. (See illustration to the left)
After the body parts are connected, we will work on fixing the fins.
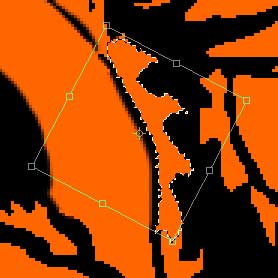
Using the Quick Mask mode.
Quick Mask Mode is a great utility in Photoshop that allows you to make very accurate selections. The Quick Mask Mode is only for making selections. We will use the Quick Mask Mode to accurately select the dragons fins.
Click on the dragon fins at the top of the dragons back using the magic wand tool. Make sure you have the image layer selected. (See illustration to the right)
With the portion of the dragon selected, switch to Quick Mask mode by clicking the "Edit in Quick Mask Mode" button at the bottom of the tool panel. (See illustration to the left)
You use the paint brush in quick mask the same as you do with the layer masks.
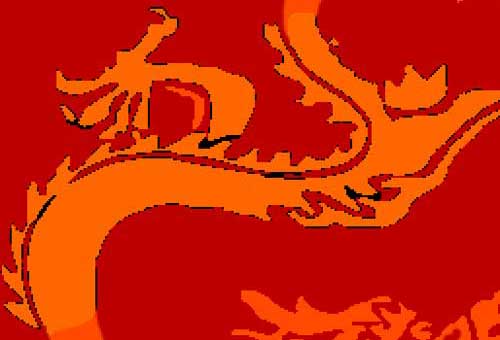
The Quick Mask Mode will appear in red all over the picture, except the areas that are not masked.
The areas that are not masked will appear lighter red. (See illustration to the left)
The lighter red section in the Quick Mask Mode is the area that you will be selecting.

Using the paint brush with black selected as the color, paint away all of the area except a small portion of the dragon fins. (See left illustration)
This will actually paint red, even though you have black selected.
Once you have the fins isolated in the Quick mask, exit Quick Mask Mode by clicking the "Edit in Quick Mask Mode" button at the bottom of the tool panel.
You will now see the fins selected only. (See illustration to the left)
Saving mask selections in the Channels panel.
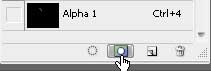
With the fins selected, go to the Channels panel. This is located next to the layers panel. You can also find the Channels panel if you go to Window/Channels. Go to the Channels panel and click the save selection at the bottom of the Channels panel. (See illustration to the left)
This will save the "fins" selection in a channel called "Alpha 1". We will now be able to use this selection as many times as we need it.
Fixing the Layer Mask using the saved selection.
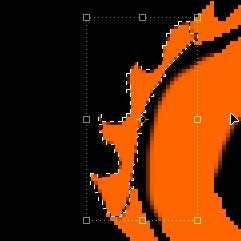
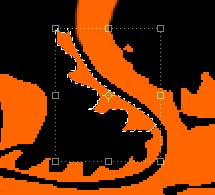
With the fins still selected, switch back to the layers panel. Make sure you have the Layer mask selected and not the image. We will now be using the black Arrow (Move Tool). Make sure you have the "Auto Select"and the "Show transform tools" boxes checked at the top in the options panel.
This will show the transform bounding box around the selection. Move the "fins" selection to a spot on the dragons back that is missing fins. Rotate the selection and Size the selection down to fit it in position. (See illustration to the left)
If the fins move with the selection, then you must have the white selected in the tool panel. Make sure you have the black selected before you can do this.
The selection should look like a duplicate of the fins you selected. Once the fins are in position, deselect (Ctrl + d). Then use the paint brush to fix any areas that are choppy looking. (See illustration to the left)
Loading a selection in the Channels panel.
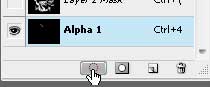
Before you load the selection, be sure you have the layer mask selected on the image layer. Go to the Channels panel. Select the load selection at the bottom of the Channels panel. Make sure you have the "alpha1" channel of the fins selected before you do this. When the selection loads, make sure only the "alpha1" channel is visible. Switch back to the layers panel.
Now you should see the selection.
Using the black arrow (Move Tool), move the selection to the bottom part of the dragon to fix the other part that is missing fins. Rotate the selection and fit it into place. Fix any part of the mask with the paintbrush that might look choppy.
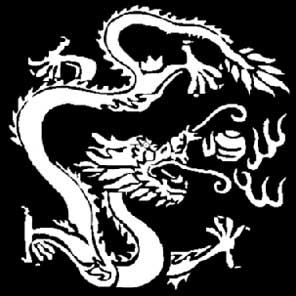
Now the dragon should look complete.
The is what the image should look like so far.
Viewing and Selecting the Mask.
You can view the mask by holding the Alt key down and clicking on the mask. The mask will show with black and white only.
This is good because you can discover flaws in the mask and fix them. You can load a layer mask as a selection by holding the shift key and clicking the mask. This makes the layer mask a quick way to get selections as well.
Blurring the layer mask.
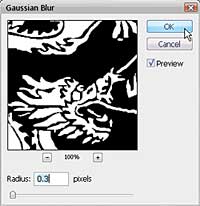
Layer masks are also great for using filters on. To use a filter on the mask, Make sure you have the Layer mask selected and not the image, and go to Filter/Blur/Gaussian Blur. In the Gaussian Blur filter dialogue box, set the Radius to 0.3 pixels. (See illustration to the left)
This will blur the layer mask, making the edges of the dragon appear smoother. Now is probably a good time to name your layers properly. It is always a good idea to name your layers accordingly, even though there may be few layers. I named my layers background and dragon.
Create a circle border layer.

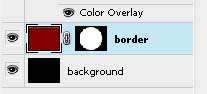
Create a layer under the image layer and fill it with #840000 color. Name it border.
Select the Elliptical Marquee Tool. (See illustration to the right)
With the elliptical marquee tool, hold the shift key and make a circular selection on the layer that was just made. Make the circle around the dragon. (See illustration to the left)
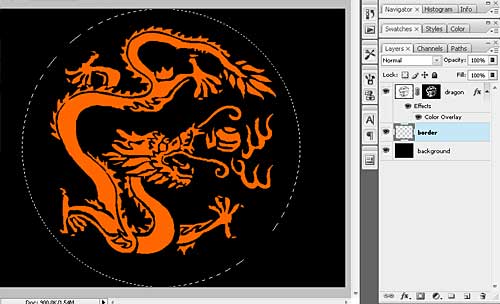
Then click the Add layer mask button at the bottom of the layers panel. (See illustration to the left)
A circular layer mask will be created from the previous step. You will be able to see the circle in the layer mask. Fill the background layer color to #431900.
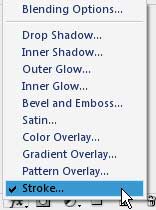
With the border layer mask selected, go to the Add a layer style button at the bottom of the layers panel.
Add a stroke to the border layer with the size of 3 pixels and the color #ff6600.
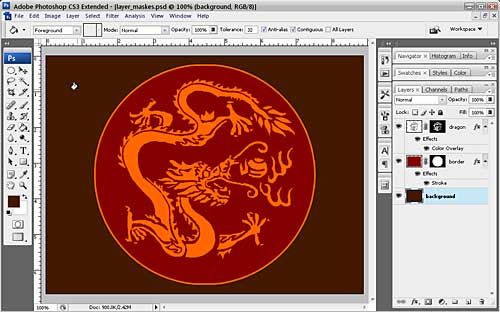
The Outcome of what was done so far.
Using Filtersr on a layer mask.
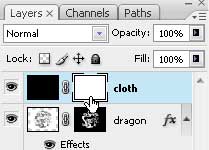
Create a new layer at the top of all of the layers and name it cloth.
Fill the layer with black.
Add a layer mask to it.
The layer mask will be all white because nothing was done to the layer mask.
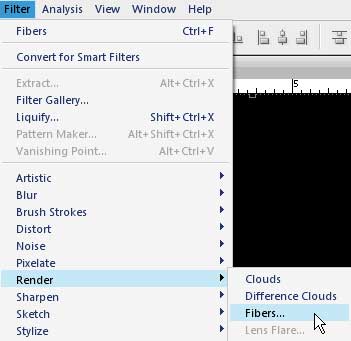
Select the layer mask and go to Filter/Render/Fibers. When you select Fibers, the Fibers dialogue box should appear.
In the fibers dialogue box, leave the default values and click OK.

Drop the fill value in your layers panel to 40%. Your layers panel should look like the illustration to the left.

Click OK
The final results
This image was reduced for the web; however, your final image should look like this. Hopefully your image looks like a "cloth Chinese emblem". Although, my wife tells me it looks like wood. At any rate, this image was created from layer masks only. None of the original image should be showing. Now you should be able to effectively use layer masks in the future.

Check Out my web content
Examples of my blog and forum posts
Examples of my content
InMotion Hosting Articles
At InMotion Hosting, I wrote hundreds of articles and answered countless support questions. Please check out my articles to get a good feel of my technical writing skills.
Web Hosting Hub Articles
I wrote many articles at the Web Hosting Hub support center. Unfortunately, I cannot produce a list of these articles as the Manager at Web Hostiung Hub set my user to Null. You can however see my support questions.
Web Development Links
Recommended Solutions
Copyright © james-richardson.org | Web Design by James Richardson at Absolute Web Dev