


Making an image with a transparent background
Originally written by James Richardson on 02/22/2009
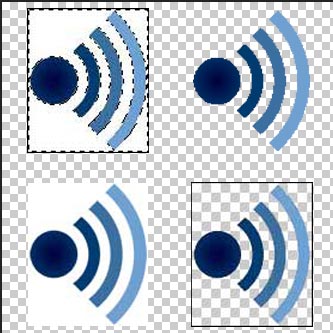
This tutorial will cover the basics of how to make an image with a transparent background. In order to make an image with a transparent background, you need to make the image format either gif (Graphics Interchange Format) or png (Portable Network Graphics). These file formats support transparency. In the illustration below, there are 4 types of file formats: jpeg, png24, png8 and gif. The left two graphics are higher 24 bit quality and the right two are lower 8 bit quality.
The difference between JPEG, GIF, and PNG
The jpeg does not support transparency so the background appears white. The good thing about making the background transparent is that the box background can be seen through the image. This is handy when making logo's and other nice graphical tricks. With the png24, the entire image can have different levels of alpha transparency; whereas, the gif and png8 only support either transparent or not. The 24 bit file formats are larger file sizes.

Jpeg Format

Png 24 Format

Png 8 Format

Gif Format
Creating the graphic
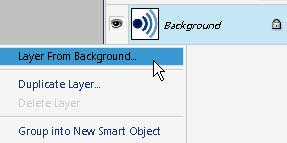
First first we need to have a graphic to work with. We will be using the jpeg image to edit. Click here to download the image. Open the image in Photoshop. You cannot edit a background layer. To edit the background layer, right click the layer and select "Layer From Background." (See Illustration below)
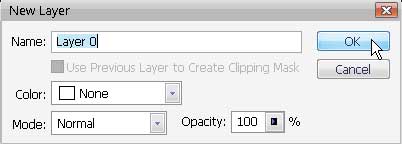
When you select "Layer From Background" the New Layer dialogue box will appear. (See Illustration below) You can name the layer whatever you want. I left the default name "Layer 0."
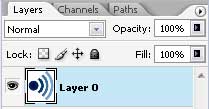
Once you name the layer you should have a layer in the Layers panel that is editable. (See Illustration below)
Remove the White from the graphic
 The easiest way to remove the white background from the image is to use the Magic Wand tool. Select the magic Wand tool and click the white area of the image. You should see the selection surrounding the white area. Hit the delete key on the keyboard or you can get the eraser and erase the white area. You should now see the transparent area afterwards. (See Illustrations below)


Save for the web
Once you have the background erased, go to Edit/Save For Web.
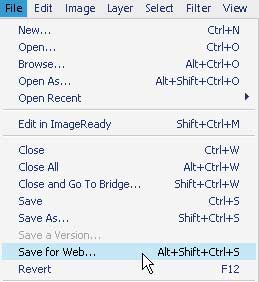
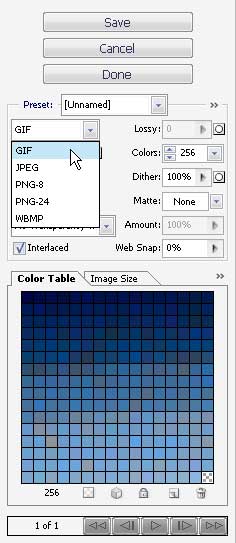
The Save For Web dialogue box should pop up. You can save your image as a gif, jpeg, png, or wbmp. In the illustration below, the gif format is being selected. Make sure the Matte is selected to none. If you save the image as a png-8, you will have practically the same options as the gif. The png-24 is higher quality and has few options. The jpeg options have a bit more that the png-24. You can reduce the quality of the jpeg in the jpeg option. With all of that said, the transparencies can only be achieved with the gif, png-8, and png-24 options.
This concludes the tutorial for making your images with a transparent background. Now you should be able to make killer logos and create great effects using transparencies.
Check Out my web content
Examples of my blog and forum posts
Examples of my content
InMotion Hosting Articles
At InMotion Hosting, I wrote hundreds of articles and answered countless support questions. Please check out my articles to get a good feel of my technical writing skills.
Web Hosting Hub Articles
I wrote many articles at the Web Hosting Hub support center. Unfortunately, I cannot produce a list of these articles as the Manager at Web Hostiung Hub set my user to Null. You can however see my support questions.
Web Development Links
Recommended Solutions
Copyright © james-richardson.org | Web Design by James Richardson at Absolute Web Dev